Setting up scannable tests involves several steps.
1The first step in the preparation of a scanneble test (right after the ROPOT is created) is to generate the test sheets.
2The test sheets need to be printed for each student.
3It is useful to print a few more answer sheets than necessary so that there are back-ups in case some students complete them incorrectly.
4The dispatch form will automatically assign the scanned answer sheets to the correct ROPOT.
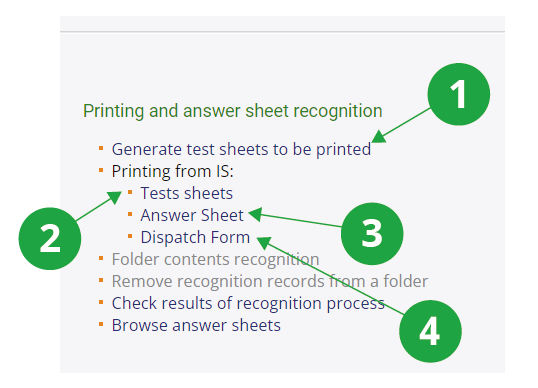
- Setting up printed tests
Information system Teacher [course selection] Work with ROPOT Generate test sheets to be printedThe first step in preparing a scanned test (right after creating the ROPOT description) is to create the test sheets. This is where you select how many test sheets will be generated for printing. If you want to create multiple identical test sheets, specify the number of times the same test sheet should be generated. The application will then create test sheets that are identical in content and differ only in the test sheet number. This option may be useful when you want to prepare assignments with the same difficulty for all students (e.g. a final state‘s examination).
1 The field for entering the required number of test sheets. This can be inspired by the number of students in the course displayed under the course name, or alternatively, by changing the filter, you can display, for example, the number of students registered for an examination date.
2 How many of the above test sheets should be the same. An empty field means that all test sheets will be unique.
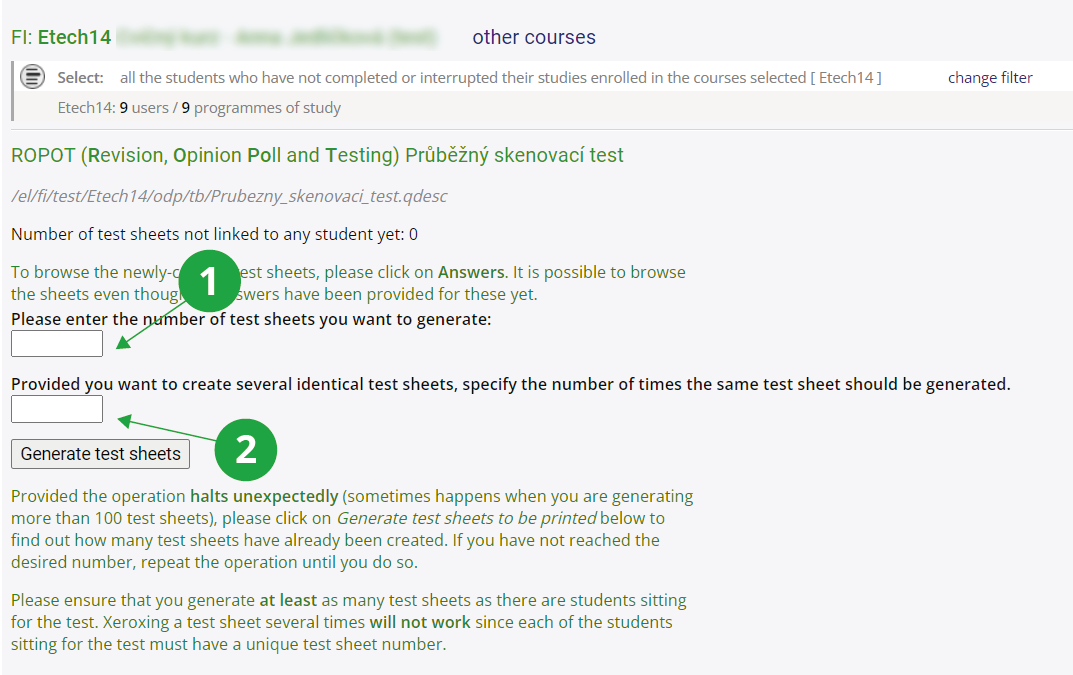
- Printing the test sheets
Information system Teacher [course selection] Work with ROPOT Printing from IS: Test sheetsYou need to select the specific ROPOT. Now you basically have two options. Try both on a few assignments and see which one "works better" for your ROPOT:
- Prepare the test sheets to be printed from a browser: Cannot achieve double-sided printing. The output will look exactly as you see it in the browser (the browser prepares the printout), i.e. tables, images etc. should look like the page in IS. Select the number of test sheets you want to print; type all the test sheets on one page, click on "Prepare the test sheets to be printed from a browser" and print. As you print, the browser will print each new test sheet on a new page.
- Printing test sheets into PDF or using a printer: You can check the option to make each test span an even number of pages for two-sided printing . If the original test sheet has an odd number of pages, then each test sheet will have an even number of pages in the resulting printable file. The numbers of the test sheets you print will be offered to you automatically. You will need to select the type of file to print to (PDF file is best) and click on "Download". The PDF file will open straight away. You be able to check that the sheets look as you wish, e.g. for double-sided printing, and print on your chosen faculty printer using the "Print" button. This printing is done by the IS subsystem, more complex elements in the test sheets (tables, images) may not work. Alternatively, you can download the PDF of the test sheet and print it afterwards.
1Preparation of the test sheets to be printed from a browser.
2Printing test sheets into PDF or using a printer.
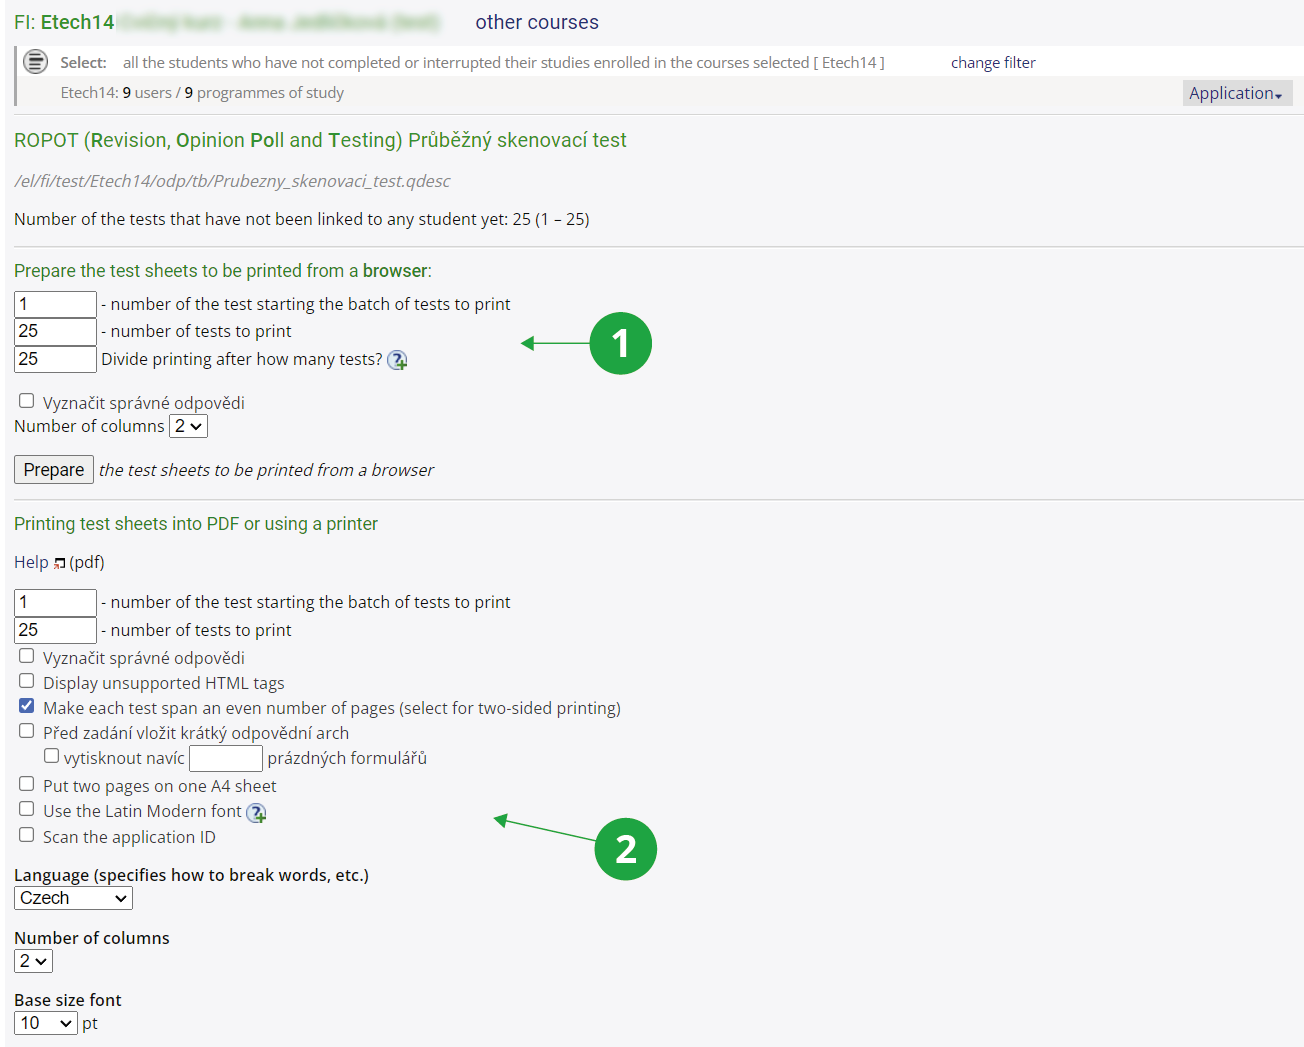
- Printing the answer sheets
Information system Teacher [course selection] Work with ROPOT Printing from IS: Answer SheetYou can select the type of questions you are using in your test (type :r to select just one correct answer, type :c to select at least one correct answer, or handwritten text with scores if you are using open-ended answers ). Choose the language and the title of the person identification field (typically leave the "personal identification number (učo)" option – other options are used, e.g. for scanning the answers of applicants for study (the "application ID" option) or for answers of persons completely unrelated to the AMBIS (the "ID selected by me" option). Then you need to enter the number of answer sheets you want to print (it is a good idea to print more than the number of test sheets you will be using, because if a student ticks a question incorrectly and wants to change his/her answer or has already used up the possible number of corrections, he/she will need to be given a new answer sheet and will fill in the answers again) and print them.
1Selecting the type of questions.
2How many questions and possible answers should be on the answer sheet. Not to be filled in for the "handwritten text with scores" option.
3Other options that affect the appearance of the answer sheet.
- Printing the dispatch form
Information system Teacher [course selection] Work with ROPOT Printing from IS: Dispatch formYou will need to enter the učo (personal identification number) of a person into whose File Depository should the scanned answer sheets be uploaded and check the option to have the test sheets recognized after they were uploaded into the depository. You need to print the dispatch form and scan it when scanning the answer sheets; place it either before or after the scanned sheets. For more information on sending scanned answer sheets to the IS, seeInformation system Printing from IS Skenování do ISu
Creating and printing the dispatch form is typically not necessary if you will be scanning and evaluating the answer sheets yourself (using Check results of recognition process). Scanned answer sheets can be uploaded to a person's depository directly and without a dispatch form by entering the person's učo (personal identification number) in the scanning program's field.
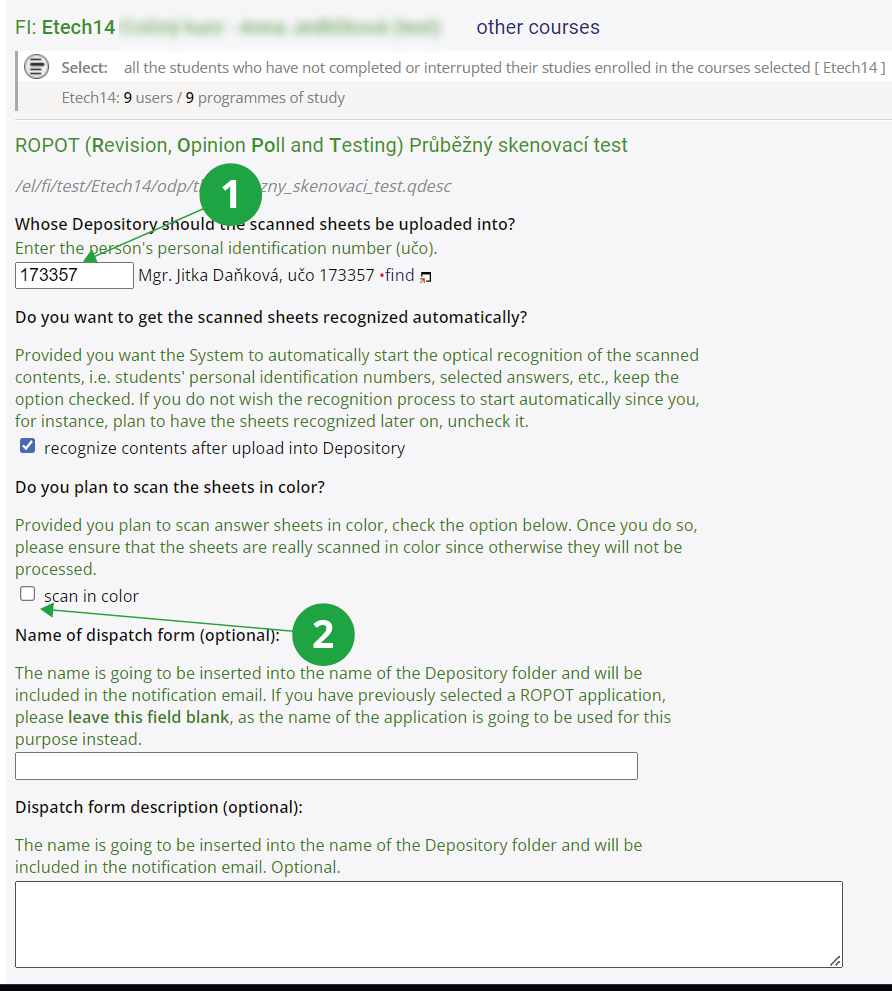
1The UIN (učo) of the person who will evaluate the answer sheets.
2Option typically for handwritten tests that the teacher corrects with colored pencil.